Get documents done even faster using the bulk upload option.
Bulk document creation is great for when you have multiple documents of the same type to create quickly, have client data housed in another source (such as excel or a CRM platform), or just prefer to work in a spreadsheet format.
Steps to Upload:
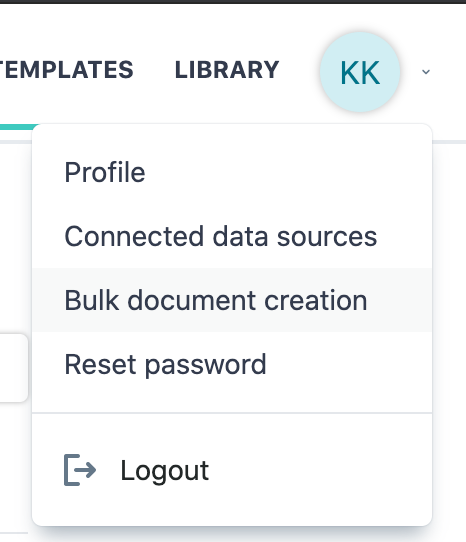
1. Click on your image/initials Icon on the top right corner of your Nod Homepage. A drop down menu will appear.

2. Click on Bulk Document Creation option.
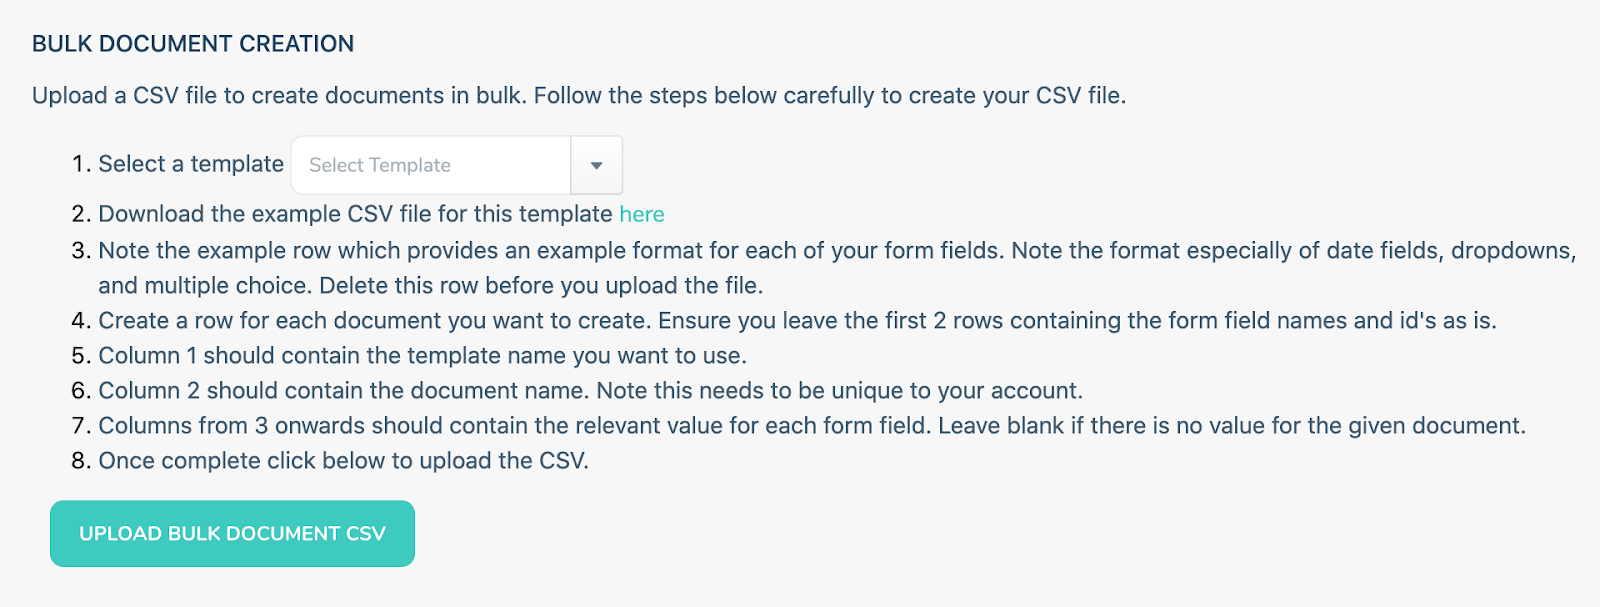
3. The Bulk Document creation page will appear. Note, instructions will appear on this page, please read them carefully.

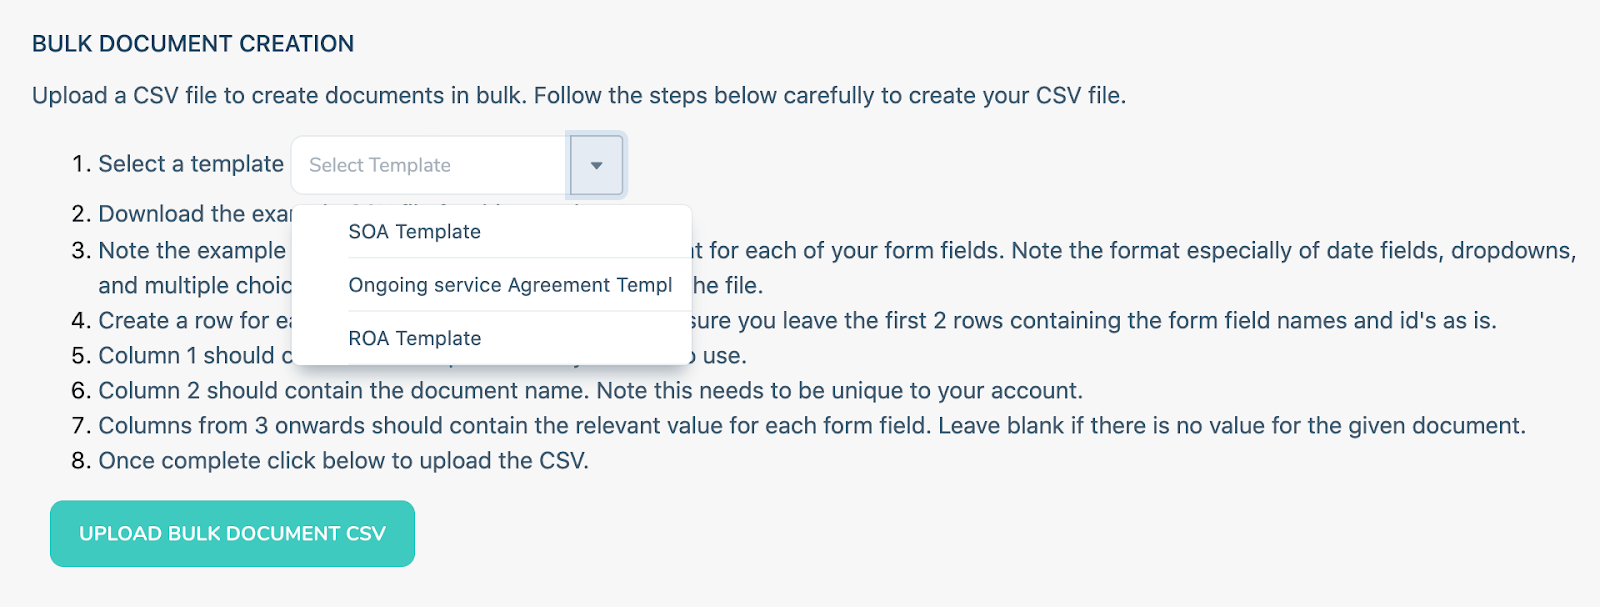
4. Click on the Dropdown arrow for selecting a template. It will show you a list of all the templates present in your account.

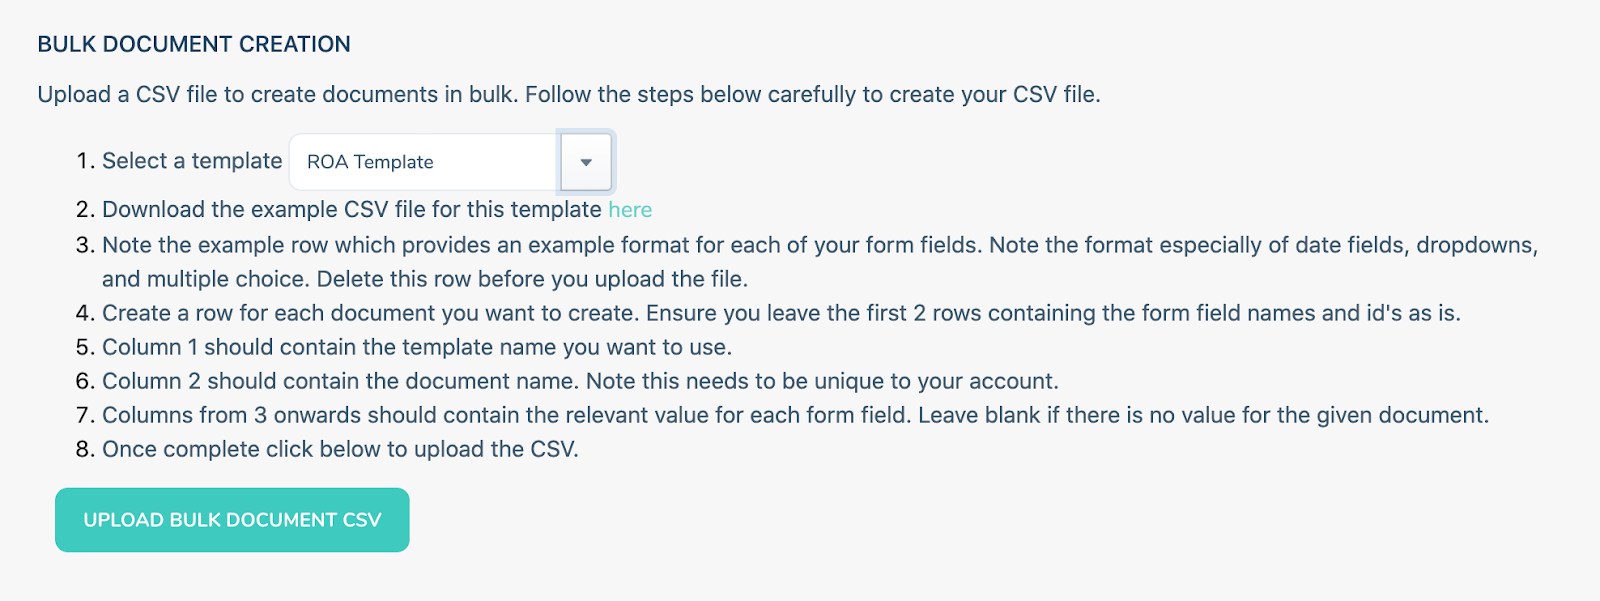
5. Click on ‘here’ in point 2 of the instructions. Download the example csv file for this template here.

6. Once you have the sample .csv file, start populating the fields in the csv file.
7. After the sheet has been filled. Click on the green UPLOAD BULK DOCUMENTS CSV button.
Note: If you already have the upload template mapped to your in house excel sheet, you can directly upload the document by clicking UPLOAD BULK DOCUMENTS CSV. In case of any errors while uploading please refer the data validation section.
Using the csv file & data validation
Find below the guide for understanding the downloaded csv file:

Row 1: Contains the Mandatory field names to create a document from the excel sheet. The first two cells should contain the template name (which should be the same as the template you selected while downloading the csv file) and the document name (the name of the document that gets created in Nod once this file is uploaded). This row should remain as is.
Row 2: Contains the coded ‘keys’ which are essential for uploading the right values to the right fields. This row should remain as is.
Row 3: Contains the data type for the fields in that column. This is just for your reference and will help in validating the field values. This row should be deleted before uploading the file. You can read more on Row 3 and data validation below.
Row 4 onwards: This is where the field values should get added to create the document in Nod.
We recommend you fill your csv file with data and then delete Rox 3.
Data Validation
For each field to be mapped correctly, the value will need to be in the correct format. For example, if you enter a date as 12/10/2021, bu the system is expecting 12/10/21 it cannot correctly map the field. This is a data validation error. If you have trouble uploading your csv file it is likely because of this error. To assist with making sure the data is in the correct format, Row 3 in the example CSV will outline the format the system is expecting. You can see a description of each format below.
Any Number: This type of field should be used for Amounts, percentages or plain numbers. The field will, however, only contain numbers (without the $ or % sign).
Any text: This type of field should be used for Client names, Product name or Address, Goals essentially any field containing text.
DD/MM/YYYY: This type of field should be used for any date field.
Note:
If the field begins with ‘One of…’ that means it’s a DROP DOWN field in the form and will only accept One of the values mentioned.
For example, ‘One of Yes, No’ will only accept the values Yes or No.
If the field begins with ‘Any of…’ that means it’s a MULTIPLE CHOICE field in the form and will accept Any of the values mentioned.
For example, ‘Any of Super Rollover, Insurance, Investment’ will accept any of the Super Rollover or Insurance separated by a comma, i.e. Insurance, Investment


.png)

